It’s one of the first questions that we ask clients when we’re helping diagnose a problem with a network resource. There are several different ways to determine your IP address. There’s even a website, whatsmyip.org which will show you what Internet servers think your IP address is.
In this post, I describe how to determine your IP address(es) on Windows 7 using the control panel. You can also use the ipconfig command-line tool, but if you know about that tool, you probably don’t need me to tell you about it.
Network and Sharing Center
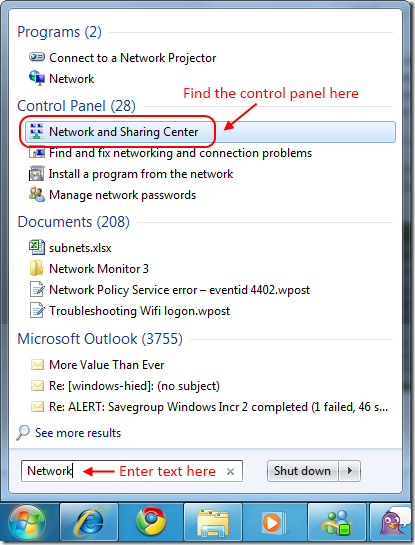
One of my favorite aspects of Windows 7 is the search feature in the start menu. As you type a search term, Windows will show you matching programs and documents.
As a case in point, you can type Network in the Start Menu search box, and click the Network and Sharing Center control panel item in the search result.
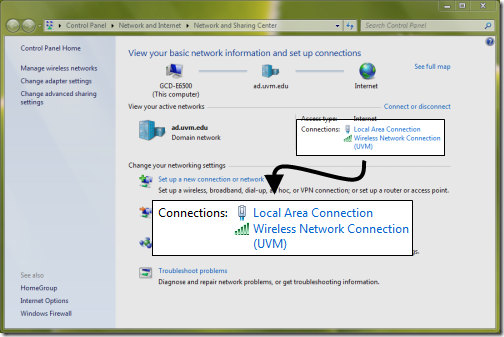
Alternatively, you can open Control Panel, then Network and Internet, and then click the Network and Sharing Center item.
Once this Control Panel applet is open, you should see a list of your network connections in the middle-right of the Window. The image below shows that my laptop has two active connections, Local Area Connection (an Ethernet cable plugged into my laptop), and Wireless Network Connection (using the UVM wifi network).
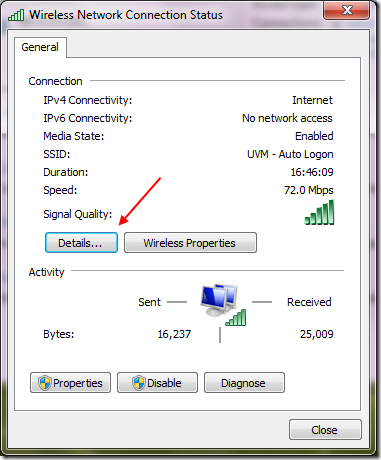
If you click on one of the connections, a status window will open. While this does list some useful information, you need to click the details button to get to the IP address information.
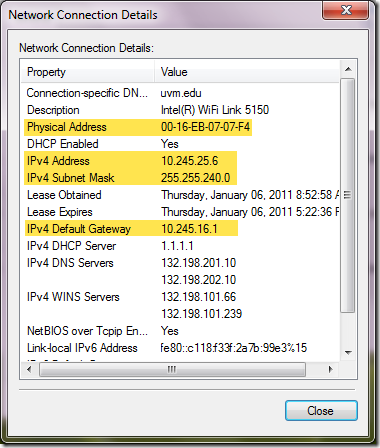
The Network Connection Details window list all the information relating to the IP configuration of the system. I’ve highlighted a few of the commonly important details in the image below.
What isn’t obvious is that you can hit Control-C on your keyboard to copy the info in this window as text, which you then can paste into an email or other document.
I hope this helps you get the information you need to solve your networking problems.


