Turn on caller announcements in Teams meetings

We have turned off announcements of callers joining or leaving calls by default. These announcements can be very disruptive to larger meetings like classes, workshops, and public events. However, you can enable caller announcements on a per-meeting basis.

Open (edit) your meeting in the Teams client and look for the Meeting options link in the menu bar. Depending on the width of your screen, it might be uner an ellipses (…) menu.

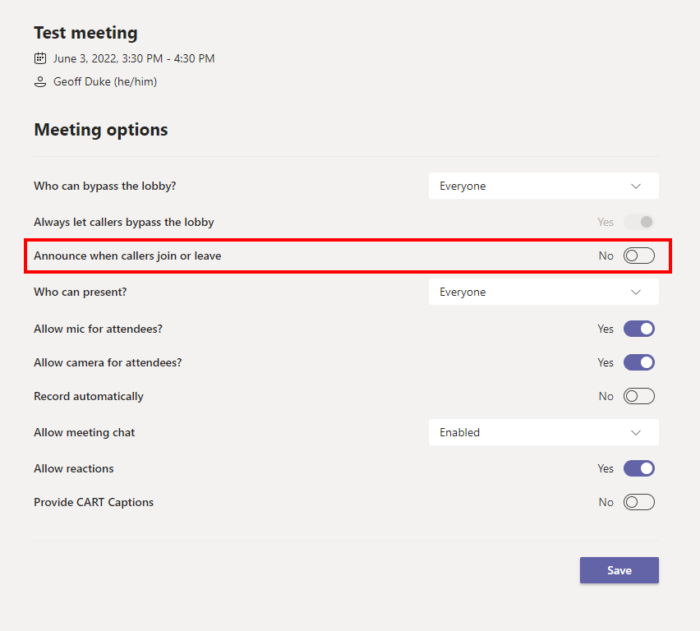
The meeting options link opens a web page with settings that apply to this meeting.

Clicking the Meeting options link will open your web browser to show a list of settings that allows you to customize the meeting to better meet your needs. For example, you might want to limit the ways participants can interact in the meeting, say during a presentation, to reduce disruptions. Most of these options can be changes on the fly during a meeting by the meeting organizer.

Among the settings you can change is Announce when callers join or leave. Make sure you click the Save button at the bottom to ensure that any changes you’ve made will apply to your meeting.

You can turn on the option to Announce when callers join or leave.

Remember that only a meeting organizer — the person who created the meeting — can change these settings. There is a feature coming to allow assignment of co-organizers which will be allow people you identify to manage these settings, among other capabilities.

Manage Teams meeting transcripts

I received a question from a client who wanted both to use the live transcript capability of a Teams meeting, but also to delete the transcript from the meeting after saving it.

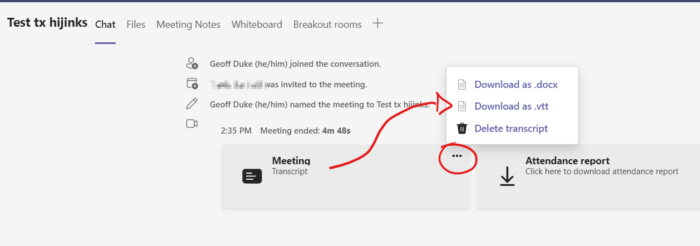
Microsoft added the Live Transcription capability to Teams meetings, and is expanding it to 1:1 calls and channel meetings. The transcript can be viewed live during the meeting, as well as when the meeting is over (or the transcription is stopped). Meeting participants will see a summary card in the meeting chat that allows them to view and/or download the transcript. In addition, the meeting organizer* can delete the transcript.

screen capture of MS Teams meeting summary cards.
The ellipses (three dots) menu provides options to download or delete the transcript.

Similar options also are available within the meeting item itself in the Teams calendar, where a Recording & Transcripts tab is available.

The transcript can also be managed from the meeting item in the Teams calendar.

I’m not entirely sure what the purpose would be for removing (but also saving) a meeting transcript. Removing the transcript doesn’t prevent someone from generating a transcript using some other, external application, or typing their own notes. Attendees also have the ability to download the transcript file until the organizer deletes it, which set up a bit of a “race condition.”

That said, the functionality in Microsoft Teams does support this workflow.

* As with meeting recordings, it is possible for someone other than the organizer to start transcription (depending on the meeting settings). Documentation indicates the transcript permissions follow the model of the meeting recording, where both the meeting organizer and the person who started transcription should be able to delete the transcript.

Capturing MS Whiteboard in Teams meeting recording

In September, Microsoft launched a new and much improved Whiteboard web app, which includes basic features like being able to add an image and reactions, but also advanced options like templates for various activities.

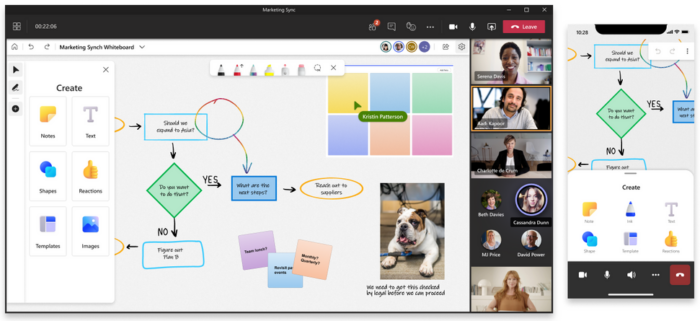
Image shows the new Whiteboard app in desktop and mobile teams clients. Whiteboard elements include flowchart with shapes and text, drawn shapes and lines, sticky notes, and an image of a bulldog.
The new whiteboard within a Teams meeting, desktop and mobile versions.

This new functionality is available from within Microsoft Teams meetings as well as via a web browser. The Windows and iOS native apps will be updated to use this new service in the coming month.

The new Whitebaord app works well, especially with a pen or stylus enabled device. One particularly irksome issue remains which dogged the previous incarnation of MS Whiteboard; meeting recordings don’t capture whiteboard content when the whiteboard is shared within the Teams meeting window. There is a small warning when you first share a whiteboard while recording a meeting:

White text on purple background with warning exclamation. Text reads "Whiteboard will not be recorded. Support for recording whiteboard is coming soon."

To work around this issue, you can open your whiteboard with a web browser at https://whiteboard.microsoft.com and then share your screen. Then the whiteboard is captured in the meeting recording just like any other shared desktop app content.

This approach also provides the benefit of setting up your whiteboard ahead of time, whereas sharing a whiteboard in a meeting from within Teams creates a new whiteboard for that meeting.

Step by step

The following procedure can be followed prior to your meeting or you can do the required steps on the fly to quickly create and share a new whiteboard.

  1. Required: In your web browser, go to https://whiteboard.microsoft.com. Click the blue “plus” button/tile labeled Create new Whiteboard.
Blue square in plus sign in center and white text "Create new Whiteboard."

If you are just planning on using the Whiteboard to deliver content, and don’t want the participants interacting with the content, stop here. You can now share your browser window or desktop into your Teams meeting and the participants will see the whiteboard contents as you work.

If you want to have an interactive Whiteboard session, then you need to create and share a link to the whiteboard. As you might expect, this will give those with the link the ability to edit the contents of the whiteboard.

  1. Click the Share button in the upper right of the screen.
Screenshot of Microsoft Whiteboard toolbar with the "Share" button highlighted.
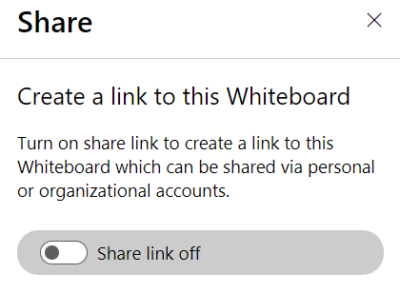
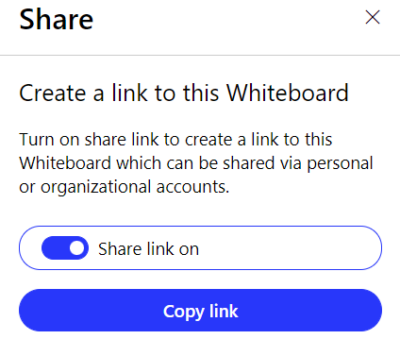
  1. A Share windows slides in from the right with the sole option to create a sharing link to let other people access the whiteboard. Click the button to enable the share link.
Image showing text "Create a link to this Whiteboard. Turn on share link to this Whiteboard which can be shared via personal or organizational accounts."  The button is on a grey background with the label "Share link off".
Before enabling the share link.
Image showing text "Create a link to this Whiteboard. Turn on share link to this Whiteboard which can be shared via personal or organizational accounts."  The button is on a blue background with the label "Share link on". A second button labeled "Copy link" appears.
And after. Note that you can turn off the sharing link later.
  1. Copy the share link and then paste this link into the meeting chat or share the link some other way with the people you want to collaborate on this whiteboard’s content.

Once you’ve opened your whiteboard in your browser window, you can share it within a Microsoft Teams meeting by sharing your whole screen or just the browser app window. Don’t select the whiteboard sharing option here; this will create a new whiteboard and it won’t be captured in the meeting recording, which is the whole point of this work-around.

You can follow step one though three ahead of a meeting and add any content that you want in preparation, perhaps using one of the templates for Brainstorming or reflecting on a project or class discussion. You may also find it useful to name your whiteboards to make them easier to find later. You can also format the background with grids or colors and add images.

After your whiteboard session is over, you can export a whiteboard as a PNG image, and you can turn off the sharing link to preserve its state

Problems accessing Teams recordings

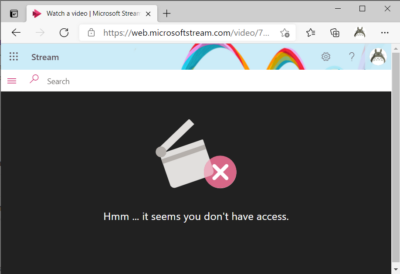
We’ve been seeing problems where students have trouble accessing the recordings for a class meeting even when the permissions on that recording indicate that a Microsoft unified group of which the students are members have viewing rights.

Web browser at the Microsoft Stream service showing an error message of "Hmm ... it seems you don't have access."
Error message: Hmm … it seems you don’t have access.

The Microsoft Stream Classic service appears to create a local cached copy of the group at the time of the recording, and this group appears not to get updated in a reliable fashion. This means that if a recording is made when a student is not yet a member of the class team, they may not be able to view a video.

Continue reading →

Can’t change meeting organizer

There’s no way to modify or update the organizer of an existing Microsoft Outlook or Teams meeting.

The organizer is the person (or account) that created and owns the meeting. Importantly, only that account can make changes or updates to the meeting.

But what happens when someone changes roles or leave the organization?

If you need to change who can modify a meeting, then you need to delete the old meeting and create new a meeting with the new account. I know canceling and recreating meetings is a bunch of busy work. Unfortunately, there aren’t any other solutions. Microsoft Teams adds some additional challenges (and also hope); see below.

Continue reading →

Change Modern Windows Event Log settings with PowerShell

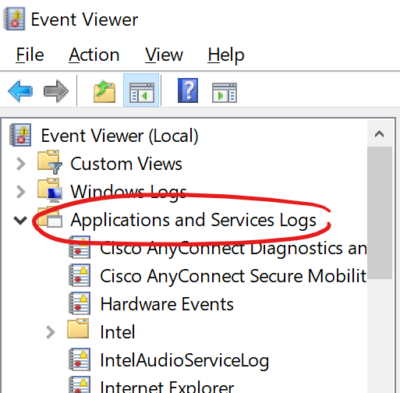
I may be late to the party, but I just found the cmlets I need to update the properties of modern Windows event logs. The Limit-EventLog cmdlet only works with classic event logs. I want to be able to manage the size of a modern event log, the kind that lives under Applications and Services logs.

Screen clip of the Window Event Viewer window with the "Applications and Services Logs" collection circled in red.
The newer event logs require different PowerShell cmdlets for managing their settings.

To read these logs, we need to use the Get-WinEvent cmdlet, but that doesn’t let us change the properties of a log. The other cmdlet with the WinEvent noun is New-WinEvent, also not helpful.

It turns out that the cmdlets we need are in the PSDiagnostics module, Get-LogProperties and Set-LogProperties. Nice. (Available in Windows PowerShell 5.1 and later).

This will allow us to do something like:

PS C:\> Get-LogProperties 'Microsoft-Windows-Ntfs/Operational'                                                          

Name       : Microsoft-Windows-Ntfs/Operational
Enabled    : True
Type       : Operational
Retention  : False
AutoBackup : False
MaxLogSize : 33554432

or

PS C:\> (Get-LogProperties 'Microsoft-Windows-Ntfs/Operational').MaxLogSize / 1MB                                       32

And you can use the Set-LogProperties cmdlet (running as admin) to change these settings. But the only two parameters are -force and -LogDetails. So first, you need to save the output of Get-LogProperties to a variable, change the properties you want to modify with the new values, and then provide this variable as input to Set-LogProperties.

Like so:

# Store Log Propertied in variable
PS C:\> $ntfslog = Get-LogProperties 'Microsoft-Windows-Ntfs/Operational'

# Confirm the ibject type
PS C:\> $ntfslog.GetType()                                                                    
IsPublic IsSerial Name                                     BaseType
-------- -------- ----                                     --------
True     False    LogDetails                               System.Object

# Set the new desired log szie value in the variable
PS C:\> $ntfslog.MaxLogSize = 40MB

# Supply the variable with the new size as the input to the Set- cmdlet
PS C:\> Set-LogProperties -LogDetails $ntfslog

# Checking our work
PS C:\> Get-LogProperties 'Microsoft-Windows-Ntfs/Operational'                                

Name       : Microsoft-Windows-Ntfs/Operational
Enabled    : True
Type       : Operational
Retention  : False
AutoBackup : False
MaxLogSize : 41943040

PS C:\> (Get-LogProperties 'Microsoft-Windows-Ntfs/Operational').MaxLogSize / 1MB
40

Convert Active Directory AccountExpires attribute

I wrote a quick function to convert the AccountExpires attribute from the Long Integer value to a DateTime object or a string object of “!! Never !!”.

function Convert-ADAccountExpires ([long] $ticks) {
    # https://msdn.microsoft.com/en-us/library/ms675098(v=vs.85).aspx

    if ( ($ticks -eq 0) -or ($ticks -eq 9223372036854775807) ) {
        $expires = '!! Never !!'
    }
    else {
        $expires = [DateTime]::FromFileTime($ticks)
    }

    write-output $expires
}

Then you can create a calculated property like so:

PS > $expires = @{Label='AccountExpires';Expression={ Convert-ADAccountExpires -ticks $_.AccountExpires } }

And then you can create reports of user accounts and when they expire:

PS> Get-ADUser -filter * | Select Name,SamAccountName,$expires

Looking at this (with slightly bleary eyes), I’m already thinking that I should add CmdletBinding(), change $ticks to $AccountExpires, and add ValueFromPipelineByPropertyName. Something to sleep on.

Find all hidden network shares

I have a Windows file server with thousands of shares. Occasionally, create hidden shares for data migration or other administrative tasks. How do you find these shares?

Some websites suggest running Get-WmiObject -Class Win32_Share and piping the output of that to Where-Object to filter. That can work, but it has the computer send you all the share objects. If you want to run this command to get shares from a remote computer, this is highly inefficient.

Instead, we can specify a filter in the initial Get- cmdlet. I’m also going to switch to the Get-CimInstance cmdlet, which is optimized for remote execution.

PS Z:\> Get-CimInstance -ComputerName ServerName -ClassName Win32_Share -Filter 'Type = "0" AND Name LIKE "%$"'

The Filter parameter uses a WQL query to specific that I want regular shares (not administrative shares like C$ or IPC$; see the Win32_Share class doc for details) AND whose names end with a dollar sign. It may not return data much faster, but it sends much less data over the wire, which is important especially for remote scenarios.

Preventing Petya ransomware with Group Policy

This post and this twitter thread describe a mechanism to prevent the latest ransomware cyber attack from running. It involves creating 1 (or 3) files with a specific name(s) and with the Read-only attribute set. Although the instructions on the first post describe copying and renaming notepad.exe, any file, even an empty file, with the correct names and the Read-only attribute will suffice, if I read the twitter thread correctly.

There are numerous ways to accomplish this in a large organization, including an SCCM package that either deploys some files, or that runs a script to create the files. However, I decided to use Group Policy File Preferences to copy a small text file to the three filenames described, including setting the Read-only attribute.

Using Group Policy File Preferences to create the files that will block the Petya (NotPetya) Ransomware.

This should be executed on the affected computers at their next GP refresh, which might be sooner than a reboot for a start-up script.